
Honeywell Pro Series Manual Español: A Comprehensive Guide
Honeywell offers comprehensive installation guides and resources, including the Pro TH3000 Series. Setup via the Honeywell Home app facilitates temperature scheduling and system configuration.
Honeywell Pro Series thermostats represent a significant advancement in home comfort and energy management; Designed for both professional installers and discerning homeowners, these thermostats offer a blend of intuitive operation, robust features, and seamless connectivity. This introduction will outline the core benefits and functionalities of the Pro Series, setting the stage for a detailed exploration of installation, configuration, and troubleshooting.

The Pro Series, including models like the TH3000, caters to a wide range of heating and cooling systems. They provide precise temperature control, customizable scheduling, and remote access via the Honeywell Home app. Installation adapters, like the standard adapter (J-box adapter), simplify the process, ensuring compatibility with existing wiring configurations. The series emphasizes ease of use, with clear on-screen prompts and a user-friendly mobile interface.
Beyond basic temperature regulation, these thermostats offer advanced features such as geofencing, smart alerts, and energy usage reports. Professional installers benefit from streamlined setup procedures and diagnostic tools. The availability of resources like the Pro Install guide and Getting Started Guide further supports a smooth and efficient installation experience. Ultimately, the Honeywell Pro Series aims to deliver a comfortable, efficient, and connected home environment.
Understanding the TH3000 Series
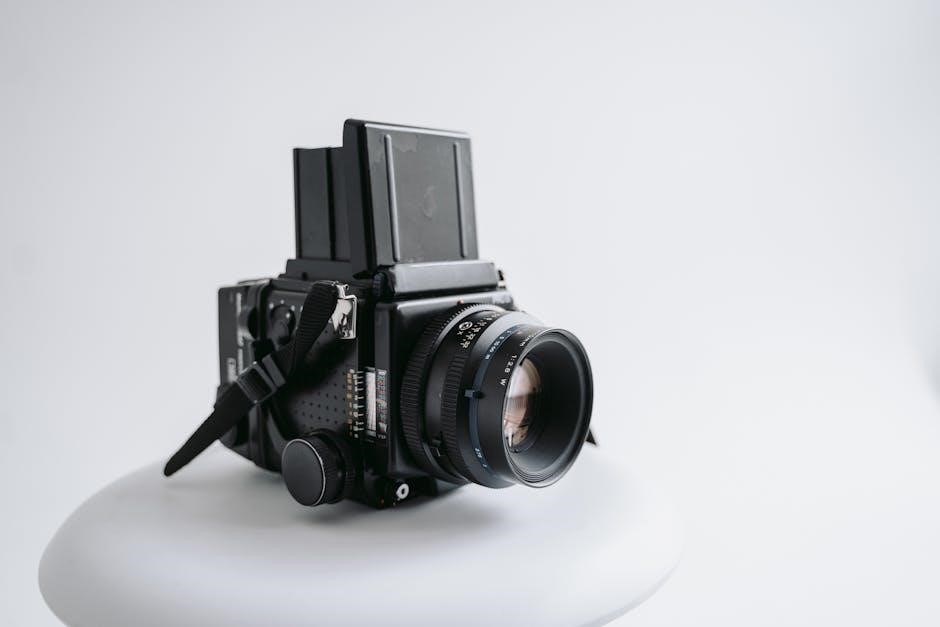
The Honeywell TH3000 Series represents a core offering within the Pro Series line of thermostats. Specifically, the TH3000 is a non-programmable digital thermostat, providing a straightforward and reliable solution for maintaining consistent home temperatures. While lacking the advanced scheduling capabilities of programmable models, it excels in simplicity and ease of use, making it ideal for users who prefer a set-it-and-forget-it approach.
Key features of the TH3000 include a clear digital display, intuitive controls for temperature adjustment, and compatibility with a wide range of heating and cooling systems. Installation is simplified through the use of standard adapters and a comprehensive installation guide. The thermostat also integrates seamlessly with the Honeywell Home app, allowing for remote monitoring and control, despite its non-programmable nature.

Furthermore, the TH3000 allows installers to configure minimum and maximum temperature set points, ensuring optimal system performance and energy efficiency. Setup is streamlined through the app, offering device setup options and access to diagnostic tools. The series 7 or later models offer the ability to enable or disable features via the app, providing added flexibility for professional installers and end-users alike.
Key Features of the Pro Series
The Honeywell Pro Series thermostats boast a range of features designed for both homeowner convenience and professional installer efficiency. Central to this is seamless integration with the Honeywell Home app, enabling remote control, monitoring, and advanced setup options. This connectivity extends to temperature scheduling, system configuration, and access to detailed device information.
Beyond app control, the Pro Series prioritizes ease of installation. Standard adapters, like the J-box adapter, simplify wiring, while comprehensive installation guides cater to various skill levels. The thermostats support a broad compatibility range with existing heating and cooling systems, minimizing upgrade complexities.
Furthermore, the series offers customizable settings, including adjustable temperature set points and fan control. Professional installers benefit from advanced features like the ability to enable or disable settings on series 7 or later models. Decorative cover plate options, such as the small 4-49/64 in size, allow for aesthetic customization. Honeywell’s commitment to quality and user-friendly design defines the Pro Series experience.
Safety Precautions Before Installation
Prior to commencing installation of your Honeywell Pro Series thermostat, strict adherence to safety precautions is paramount. Always disconnect power to your heating and cooling system at the breaker box or fuse panel to prevent electrical shock. Verify the power is off using a non-contact voltage tester before handling any wiring.
Exercise caution when working with wiring; incorrect connections can damage the thermostat or your HVAC system. If you are uncomfortable with electrical work, consult a qualified HVAC professional for installation assistance. Ensure the installation location is dry and free from obstructions.
Review the installation guide thoroughly before beginning. Familiarize yourself with the thermostat components and wiring diagrams. Proper grounding is essential for safe operation. Dispose of old thermostats and batteries responsibly, following local regulations. Keep small parts away from children. Honeywell prioritizes safety; following these guidelines ensures a secure and successful setup.
Tools Required for Installation
Successful installation of your Honeywell Pro Series thermostat necessitates a specific set of tools. A Phillips head screwdriver is essential for mounting the thermostat base and securing wiring connections. A flathead screwdriver may be needed for certain terminal screws. Wire strippers are crucial for preparing the thermostat wires, ensuring clean and secure connections.
A non-contact voltage tester is vital for verifying power is disconnected before handling wiring, prioritizing safety. Pliers can assist with bending and manipulating wires. A level ensures the thermostat base is mounted straight for accurate temperature readings. A drill with appropriate drill bits may be required for creating mounting holes, depending on your wall type.
A pencil is useful for marking mounting hole locations. Screws and anchors, often included with the thermostat, are needed for secure mounting. The Honeywell Home app, accessible via smartphone or tablet, is required for initial setup and configuration. Having these tools readily available streamlines the installation process.
Identifying Thermostat Components
The Honeywell Pro Series thermostat comprises several key components. The thermostat base, typically mounted to the wall, provides a secure foundation. The display screen showcases temperature settings, system status, and operational modes. The control buttons or touchscreen interface allow for user interaction and adjustments.
Terminal blocks, located within the base, facilitate wiring connections for heating, cooling, and fan systems. A decorative cover plate enhances the aesthetic appearance, concealing the base and wiring. The adapter (J-box adapter) ensures compatibility with existing wall boxes. The Series 20 valve terminal, when applicable, manages fluid control.
Internal sensors measure ambient temperature, providing accurate readings. The processor controls thermostat functions based on user settings and sensor data. The power source, typically 24VAC, energizes the system. Understanding these components is crucial for successful installation and troubleshooting. Refer to the manual for detailed diagrams and component locations.
Wiring Basics for Honeywell Pro Series
Honeywell Pro Series thermostats utilize standard color-coded wiring for compatibility with most HVAC systems. Common terminals include R (power), C (common), Y (cooling), G (fan), W (heating), and others depending on system configuration. Proper wiring is essential for safe and reliable operation.
The R terminal receives 24VAC power, while the C terminal provides a return path. The Y terminal activates the cooling system, and the G terminal controls the fan. The W terminal energizes the heating system. Always disconnect power before working with wiring. Use appropriate wire connectors and ensure secure connections.
Refer to the wiring diagram in the installation guide for your specific model. Incorrect wiring can damage the thermostat or HVAC system. If unsure, consult a qualified HVAC technician. The adapter (J-box adapter) may be required for certain installations. Double-check all connections before restoring power. Understanding these basics ensures a smooth setup process.
Compatibility with Existing Systems
Honeywell Pro Series thermostats are designed for broad compatibility with most 24VAC heating and cooling systems, including furnaces, air conditioners, heat pumps, and boilers. However, compatibility isn’t universal. Systems with line voltage (120V/240V) or proprietary communication protocols may require adapters or be incompatible.
Before installation, verify your system’s voltage and wiring configuration. The Honeywell Home app and online resources offer compatibility checkers to assist in this process. Millivolt systems, common in fireplaces, often require specific Pro Series models or adapters.
If your system utilizes a Series 20 valve terminal, ensure proper connection according to the installation guide. Older or unconventional systems may necessitate professional installation. Confirm that your existing wiring includes a common (C) wire; if not, a C-wire adapter might be needed. Careful assessment ensures a successful setup and avoids potential issues.
Installation Guide: Step-by-Step
Begin by powering off your HVAC system at the breaker. Remove your old thermostat, carefully labeling each wire before disconnecting it. Use the provided Honeywell adapter plate if your wall doesn’t accommodate the Pro Series base. Mount the base securely with the included screws and anchors.

Connect the wires to the corresponding terminals on the Honeywell thermostat base, referencing the wiring diagram in the installation guide. Ensure wires are firmly seated. Attach the thermostat to the base. Restore power to your HVAC system.
Follow the on-screen prompts for initial setup, including Wi-Fi connection and registration with the Honeywell Home app. Configure system settings, such as heating and cooling modes. Test the system to verify proper operation. Refer to the Pro Install resources for detailed assistance.
Mounting the Thermostat Base
Prior to mounting, ensure the HVAC system’s power is completely switched off at the breaker panel. Carefully remove your existing thermostat from the wall, noting the wire connections. If the existing wall doesn’t align with the Honeywell Pro Series base, utilize the supplied adapter plate – this is a standard installation component.
Position the thermostat base on the wall, ensuring it’s level. Mark the screw holes using a pencil. Drill pilot holes if necessary, especially for drywall. Secure the base to the wall using the provided screws and anchors. Confirm the base is firmly attached and doesn’t wobble.
A secure mounting is crucial for proper operation and aesthetics. The Honeywell base is designed for easy wire access. Refer to the installation guide for visual aids. Proper mounting prevents strain on the wires during connection and ensures long-term stability.
Connecting the Wires (Detailed)
With the thermostat base securely mounted and power off, carefully connect the wires. Refer to the wiring diagram included in your Honeywell Pro Series manual and the markings on the thermostat base. Common terminals include R (power), C (common), W (heat), Y (cool), and G (fan).
Use a small screwdriver to loosen the terminal screws. Insert each wire firmly into the corresponding terminal, ensuring no bare wire is exposed. Tighten the screws to secure the connections. A loose connection can cause system malfunctions. Double-check each wire against the diagram.
The Series 20 valve terminal utilizes specific connections (R 1, Rc, RRc). If using a J-box adapter, ensure it’s properly installed. For Pro Install scenarios, accurate wiring is paramount. If unsure, consult a qualified HVAC technician. Incorrect wiring can damage your system.
Powering On and Initial Setup
Once the wiring is verified, restore power to the HVAC system at the breaker. The Honeywell Pro Series thermostat should power on automatically. The initial setup will guide you through essential configurations. This includes selecting your system type (heating, cooling, or heat pump) and setting the date and time.
Follow the on-screen prompts to connect the thermostat to your home’s Wi-Fi network. This enables remote control via the Honeywell Home app. During setup, you’ll be asked to create or log in to your Honeywell Home account. The app provides advanced features like scheduling and energy usage monitoring.
The installer setup allows for customization of advanced settings. For Series 7 or later, contractors can enable/disable features. Ensure the minimum and maximum temperature setpoints are configured. Refer to the manual for detailed instructions. Proper initial setup ensures optimal performance.
Using the Honeywell Home App
The Honeywell Home app is central to controlling your Pro Series thermostat remotely. After creating an account and connecting the thermostat to Wi-Fi, you can adjust the temperature from anywhere with an internet connection. The app displays current temperature readings and allows for quick adjustments to heating and cooling settings.

A key feature is the ability to create and manage temperature schedules. Customize schedules for weekdays, weekends, or specific times of day to optimize comfort and energy savings. The app also provides insights into your energy usage, helping you identify areas for improvement.
Through the app, you can access advanced settings, including fan control and system configuration. Device setup options are readily available. Honeywell Home is utilized under license from Honeywell International, Inc. Explore the app’s features to fully leverage your thermostat’s capabilities.
Setting Temperature Schedules
Creating personalized temperature schedules is a core function of the Honeywell Home app for your Pro Series thermostat. Schedules allow you to automate temperature adjustments based on your daily routine, maximizing comfort and minimizing energy consumption. You can define different temperature setpoints for various times of the day, such as waking hours, daytime, evening, and sleep.
The app interface provides an intuitive way to create and modify schedules. Easily set minimum and maximum temperature limits for both heating and cooling modes. You can establish unique schedules for weekdays and weekends, accommodating varying lifestyles. The app remembers your preferences and automatically adjusts the temperature accordingly.
Consider setting lower temperatures when you’re away or asleep to conserve energy. The Honeywell Home app’s scheduling features empower you to tailor your home’s climate to your specific needs and preferences, optimizing both comfort and cost savings.
Adjusting Fan Settings
The Honeywell Pro Series thermostat offers flexible fan control options, accessible through both the thermostat interface and the Honeywell Home app. You can choose between “Auto” and “On” modes. In “Auto” mode, the fan operates only during heating or cooling cycles, ensuring efficient energy use and consistent temperature distribution.
Selecting “On” mode keeps the fan running continuously, even when heating or cooling isn’t active. This can improve air circulation and help maintain a more uniform temperature throughout your home, particularly in larger spaces or those with uneven heating/cooling. Continuous fan operation can also contribute to better air quality by constantly filtering the air.
Within the app, you can easily toggle between these modes. Experiment with both settings to determine which best suits your comfort preferences and energy-saving goals. Consider using “Auto” for typical operation and “On” during periods requiring enhanced air circulation or filtration.
Configuring System Settings
Honeywell Pro Series thermostats provide extensive system settings customization via the device itself and, more comprehensively, through the Honeywell Home app. These settings allow fine-tuning for optimal performance and compatibility with your specific HVAC system.
Key configurable options include setting minimum and maximum temperature limits for both heating and cooling, preventing extreme temperatures and conserving energy. You can also adjust swing settings, which determine the temperature difference before the system cycles on or off, impacting comfort and efficiency.
Advanced settings allow for configuring system type (heat pump, forced air, etc.), enabling or disabling features like humidity control, and adjusting dealer setup options. For Series 7 or later, contractors can disable device setup options. Accessing these settings often requires a specific installer code for security.
Regularly reviewing and adjusting these settings ensures your thermostat operates efficiently and effectively, maximizing comfort and minimizing energy consumption.
Troubleshooting Common Issues
Honeywell Pro Series thermostats, while reliable, can occasionally encounter issues. Common problems include a thermostat not powering on, often due to wiring errors or insufficient power. Verify the C-wire connection, as many models require it. If the display is blank, attempt a reset.
Temperature inaccuracies can stem from improper thermostat placement, drafts, or calibration errors. Ensure the thermostat isn’t near heat sources or direct sunlight. Utilize the app to calibrate the temperature if needed.
Connectivity issues with the Honeywell Home app are frequently resolved by checking your Wi-Fi connection and ensuring the thermostat is within range. Restarting both the thermostat and your router can also help.
Understanding error codes displayed on the screen is crucial. Consult the manual for a comprehensive list and corresponding solutions. If problems persist, contacting Honeywell support or a qualified HVAC technician is recommended.
Resetting the Thermostat
Resetting your Honeywell Pro Series thermostat can resolve various operational issues, from connectivity problems to incorrect settings. There are typically two reset options: a soft reset and a factory reset. A soft reset, often achieved by cycling the power (turning off the breaker for a minute), restarts the thermostat without erasing personalized settings.
A factory reset, however, restores the thermostat to its original, out-of-the-box configuration. This is useful if you’re selling the unit or experiencing significant malfunctions. The process usually involves navigating the thermostat’s menu system – often under “Settings” or “Advanced” – and selecting the “Reset” or “Factory Reset” option.
Before performing a factory reset, note that you’ll need to re-establish the Wi-Fi connection and reconfigure your temperature schedules and preferences. Refer to the Honeywell Home app or the manual for specific instructions tailored to your thermostat model (TH3000 Series, for example).

Understanding Error Codes
Honeywell Pro Series thermostats utilize error codes to diagnose system malfunctions, providing valuable insights for troubleshooting. These codes appear on the thermostat display or within the Honeywell Home app, indicating issues with wiring, sensor functionality, or communication with HVAC components.
Common error codes relate to heating or cooling system failures, such as “E1” for a lost connection to the HVAC equipment or “E2” signaling a sensor problem. Specific codes vary depending on the model (like the TH3000 Series) and the complexity of your system. The manual provides a comprehensive list of error codes and their corresponding meanings.
When an error code appears, consult the manual first. Attempting simple fixes like checking wiring connections or replacing batteries might resolve the issue. If the error persists, contacting a qualified HVAC technician is recommended. Ignoring error codes can lead to further damage or inefficient system operation. The Honeywell Home app often provides additional support resources and troubleshooting steps.
Where to Find Additional Support (Español)
For comprehensive support regarding your Honeywell Pro Series thermostat, several resources are readily available. The official Honeywell Home website (honeywellhome.com) offers a detailed FAQ section, downloadable manuals – including Español versions – and troubleshooting guides for models like the TH3000 Series.
Honeywell’s support portal provides access to installation guides, wiring diagrams, and videos demonstrating setup procedures. You can also find specific information related to the Series 20 valve terminal. The Honeywell Home app itself features a help section and direct access to customer support representatives.
For Español-language assistance, navigate the Honeywell Home website and select your preferred language. Alternatively, search online forums and communities dedicated to Honeywell thermostats, where users share experiences and solutions. Professional installers listed on the Honeywell website can also provide expert assistance and Pro Install services.
Honeywell Pro Series Valve Terminal Series 20
The Honeywell Pro Series Valve Terminal Series 20 is a crucial component for hydronic heating and cooling systems. This terminal, identified as R 1 and Rc/Rrc, utilizes a slider tab for connection, ensuring secure and reliable operation. It’s designed for compatibility with various Honeywell thermostats, including those within the TH3000 Series.
Understanding the wiring configuration of the Series 20 is essential for proper installation. The terminal facilitates connections for heating, cooling, and common wires, enabling precise temperature control. Refer to the installation guide for detailed wiring diagrams and instructions specific to your system.

Honeywell provides comprehensive documentation, including schematics and troubleshooting tips, to assist installers and technicians. Proper installation ensures optimal performance and longevity of the valve terminal. The Series 20 is often used in conjunction with the Honeywell Home app for advanced system control and monitoring. Always consult the manual for safety precautions and best practices.
Decorative Cover Plate Options
Honeywell Pro Series thermostats offer a range of decorative cover plate options to seamlessly integrate with diverse interior designs. These plates enhance the aesthetic appeal of the thermostat while maintaining full functionality. Available in various colors and finishes, they allow for customization to complement any décor.
A small-sized cover plate, measuring 4-49/64 inches (121mm), is a popular choice for a discreet appearance. Honeywell provides screws and anchors for secure mounting. These cover plates are designed for easy installation and removal, facilitating quick access for maintenance or battery replacement.
Refer to the Professional Install Guide and Getting Started Guide for detailed instructions on selecting and installing the appropriate cover plate. The TH6320WF2003 model is often paired with specific cover plate options. Choosing the right cover plate not only improves the visual appeal but also protects the thermostat from dust and damage, ensuring long-term reliability. Explore the available options to personalize your Honeywell thermostat setup.
Professional Install Guide Resources
Honeywell provides extensive resources for professional installers working with the Pro Series thermostats, ensuring efficient and accurate installations. These resources include detailed Professional Install Guides, complementing the standard user manuals and Getting Started Guides.
Installers can access guides covering wiring diagrams, system compatibility checks, and advanced configuration options. The guides detail procedures for configuring installer setup, including setting minimum and maximum temperature limits, and configuring cooling and heating setpoints via the Honeywell Home app.
Specific guides address the TH3000 Series, outlining the non-programmable digital thermostat’s features and installation process. Resources also cover enabling or disabling settings for Series 7 or later thermostats, offering greater control over system functionality. Honeywell’s website offers downloadable PDFs and interactive tools to assist professionals. Utilizing these resources guarantees a smooth installation and optimal performance of the Honeywell thermostat system.